OCR Engine Configuration
The OCR Engine Configuration feature in TruCap+ allows users to customize and set up multiple OCR engines according to their specific requirements. This documentation provides a step-by-step guide on how to leverage this feature effectively to enhance document processing capabilities.
Configuring Multiple OCR Engines
With this feature, users gain the flexibility to configure multiple OCR engines available in TruCap+. These OCR engines play a crucial role in converting scanned documents into machine-readable text, enabling efficient data extraction. By customizing OCR engine settings, users can optimize document processing accuracy and performance.
Selecting an OCR Engine for Document Processing
TruCap+ offers the ability to choose any one of the configured OCR engines for processing documents. Users can select the most suitable OCR engine based on factors such as document type, language, or format. This ensures that the application utilizes the best-suited OCR engine for each specific document, resulting in improved accuracy and data extraction efficiency.
Access Permissions for OCR Engine Configuration
The OCR Engine Configuration feature has specific access permissions:
Adding OCR Engine (Admin Level Users Only): Only users with admin level access can add new OCR engines to the system. This ensures that the addition of OCR engines is managed by authorized personnel, maintaining control and consistency in the application's configuration.
Setting OCR Parameters (Users with Required Permissions): Users with the necessary permissions can configure OCR parameters for each OCR engine. This access control ensures that only authorized users can modify OCR settings, preventing unauthorized changes that may affect document processing outcomes.
Note
-
The type of activity permitted depends on your role and the permissions granted to your role. See Managing roles for more information.
-
To access the admin user interface, type "\admin" after the base url. Enter the admin related credentials to access the admin user interface.
Accessing OCR Engine Configuration
For Admin users
Admin users can access the OCR Engine Configuration page by following these steps:
-
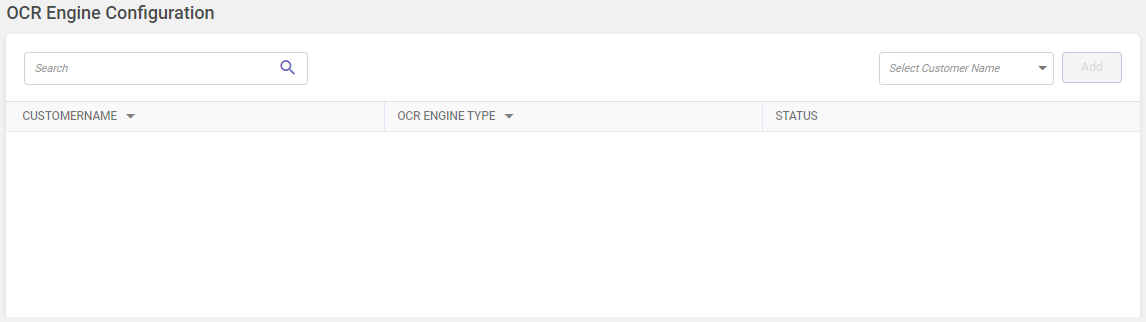
In the main menu, under Setup Application, click OCR Engine Configuration. The OCR Engine Configuration page opens.

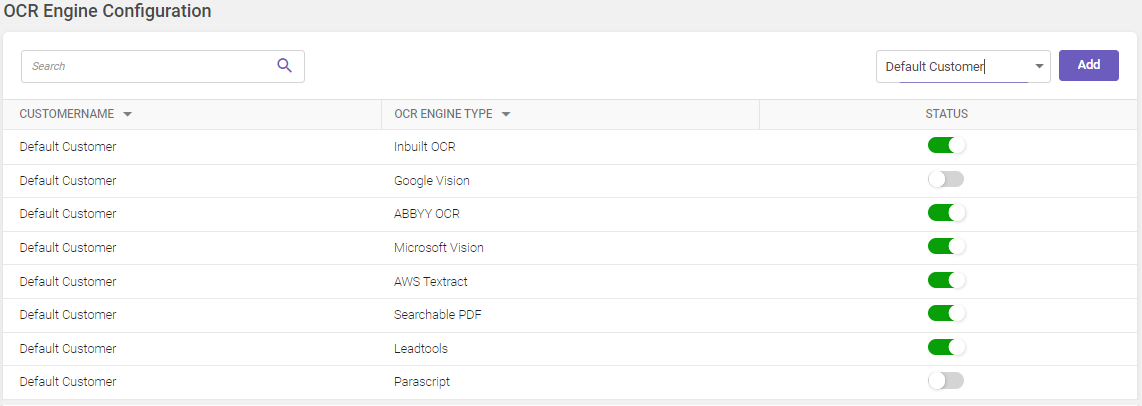
Column header descriptions
COLUMN NAME
DESCRIPTION
Customer Name
Displays the customer name.
OCR Engine Type
Displays the OCR engine name.
Status
Displays the active/inactive status of the OCR engine.
-
Select the required customer name from the Select Customer Name drop-down list at the top-right corner of the page. The records of the customer name and OCR engine type are displayed as shown in the image below.

Note:
The process of adding a new OCR engine is exclusively available to system administrators.
To add an OCR engine, follow these steps:
-
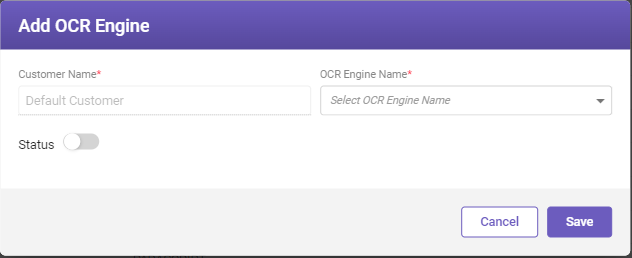
Access the admin interface. In the top-right corner, use the drop-down to select the desired customer name. An Add button is enabled, click Add. The Add OCR Engine window opens.

-
Fill-in the details based on the following field descriptions.
FIELD
DESCRIPTION
Customer Name*
Select the customer name for whom you want to add OCR engine from the drop-down list.
OCR Engine Name*
Select the required OCR engine name from the drop-down list.
Status
Enable or disable the toggle button to activate or deactivate the OCR engine selected for the customer.
* Mandatory fields
-
Click Save to save the details.
For Admin and Application Users 
Both admin and non-admin users with appropriate permissions can access the OCR engine configuration page.
To access the OCR Engine Configuration page, follow these steps:
-
In the main menu, under Application Setup, click OCR Engine Configuration. The OCR Engine Configuration page opens.


Column header descriptions
|
COLUMN NAME |
DESCRIPTION |
|---|---|
|
Customer Name |
Displays the customer name. |
|
OCR Engine Type |
Displays the OCR engine name. |
|
Status |
Displays the active/inactive status of the OCR engine. |
|
Action |
Links to set the OCR parameters. |
Setting OCR parameters
There are different OCR parameters for every engine listed in the following table. Users need to specify the required parameters and save the settings for the engine.
Note:
If an OCR engine that runs through an online service such as Google Vision, ABBYY OCR, Microsoft Vision, AWS Textract, and Parascript is unavailable for processing. In that case, it is notified to the user as a notification message in the format Document ID ######: OCR Service XXXXXXX is not available for processing. For Example: Document ID 123456: OCR Service AWS Textract is not available for processing
Click on the Set OCR Parameters link under the Action column on the OCR Engine Configuration page corresponding to the OCR engine to specify the required parameters.
Below is the list of available OCR engines in TruCap+ with its parameters.
 Inbuilt OCR
By configuring the parameters based on your specific requirements, you can optimize the behavior and performance of the Inbuilt OCR engine to achieve accurate and efficient text recognition.
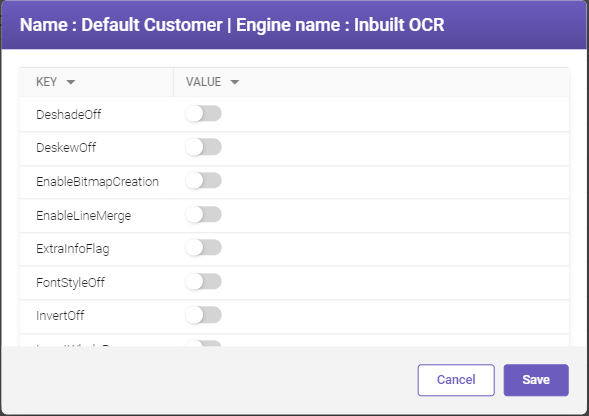
Refer the table below for parameter description.
|
PARAMETER |
DESCRIPTION |
|---|---|
|
DeshadeOff |
Turns off shading removal from the document. When enabled with a value of 1, deshading will be applied to the document. |
|
DeskewOff |
Enables deskewing of the document. When enabled with a value of 1, deskewing will be applied to the document. |
|
EnableBitmapCreation |
Generates a bitmap representation of the OCR image when enabled. |
|
EnableLineMerge |
Combines broken lines received from OCR by enabling this option. |
|
ExtraInfoFlag |
Returns additional bitmap image when enabled. |
|
FontStyleOff |
Disables font style information in the OCR result when turned on. |
|
InvertOff |
Prevents individual zones in a job from being analyzed for auto inversion. When turned on, auto inversion is disabled. |
|
InvertWholePage |
Inverts the entire page prior to processing when enabled. |
|
LineRejectOff |
Rejects lines of noise from the document. When enabled with a value of 1, lines of noise will be rejected. |
|
LineRemoveOff |
Removes lines from the document. When enabled with a value of 1, lines will be removed. |
|
MergeBreakOff |
Merges broken characters or breaks merged characters on the document. When enabled with a value of 1, merging or breaking is applied. |
|
NoiseRemoveOff |
Removes noise from the document. When enabled with a value of 1, noise removal is applied. |
|
OCRBOnly |
Restricts recognition to character codes below 256 when enabled. When disabled, OCR engine assumes the whole image is in the OCRB font for better accuracy with OCRB font. |
|
Orientation |
Detects orientation and rotates the document as necessary when enabled. |
|
ReturnNoiseOn |
When enabled with a value of 0, characters rejected as noise will be returned and displayed as noise. |
|
SectioningOn |
When enabled with a value of 0, the page will be sectioned, and results will be returned in "read order". |
|
Speed |
Adjusts the speed of the OCR engine when enabled. |
|
ValidExtensions |
Supports file formats such as .PDF, .TIF, .TIFF, etc. |
Google Vision
By configuring the parameters in accordance with your needs, you can ensure the proper integration and functionality of the Google Vision OCR engine within your application.
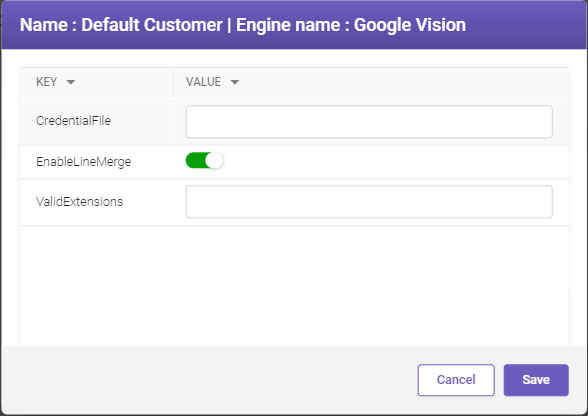
Refer the table below for parameter description.
|
PARAMETER |
DESCRIPTION |
|---|---|
|
CredentialFile |
Specifies the file path to the Google Vision account credential file required for establishing a connection. |
|
EnableLineMerge |
Enables the logic that combines broken lines received from OCR. |
|
ValidExtensions |
Supports file formats such as .PDF, .TIF, .TIFF, etc. |
ABBYY OCR
By configuring the parameters according to your application's requirements, you can enable seamless integration with the ABBYY OCR engine and effectively perform accurate text recognition within your documents.

Refer the table below for parameter description.
|
FIELD |
DESCRIPTION |
|---|---|
|
ApplicationId |
Specifies the application ID required for establishing a connection with the ABBYY cloud OCR service. |
|
ApplicationPassword |
Specifies the application password required for authentication when connecting to the ABBYY OCR service. |
|
EnableLineMerge |
Enables the logic that combines broken lines received from OCR. |
|
ServerUrl |
Specifies the ABBYY cloud OCR service server URL. |
|
ValidExtensions |
Supports file formats such as .PDF, .TIF, .TIFF, etc. |
Microsoft Vision
By configuring these parameters based on your application's requirements, you can ensure seamless integration with the Microsoft Vision OCR engine, enabling accurate and efficient text recognition within your documents.
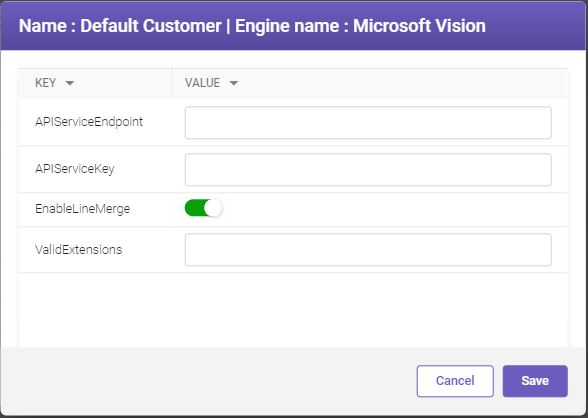
Refer the table below for parameter description.
|
FIELD |
DESCRIPTION |
|---|---|
|
APIServiceEndpoint |
Microsoft Computer Vision service endpoint URL. |
|
APIServiceKey |
Microsoft Azure service key required for connection. |
|
EnableLineMerge |
Enable this option to run the logic which combines the broken lines received from OCR. |
|
ValidExtensions |
Supported file formats like .PDF, .TIF, and .TIFF etc. |
AWS Textract
By configuring the parameters according to your application's needs, you can ensure successful integration with the AWS Textract OCR engine and perform accurate text recognition within your documents.
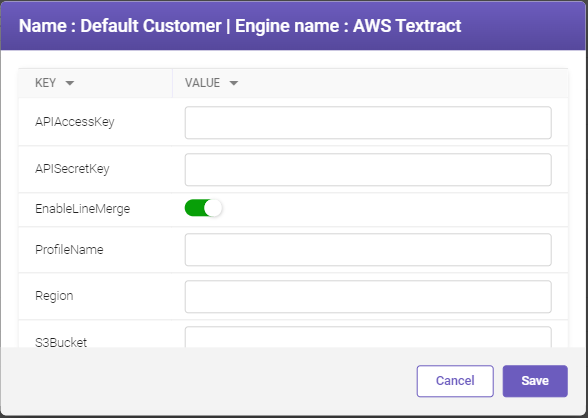
Refer the table below for parameter description.
|
FIELD |
DESCRIPTION |
|---|---|
|
APIAccessKey |
Specifies the AWS account access key required for connecting to the AWS Textract service. |
|
APISecretKey |
Specifies the AWS account secret key required for authentication when connecting to AWS Textract. |
|
EnableLineMerge |
Enables the logic that combines broken lines received from OCR. |
|
ProfileName |
Specifies the AWS account profile name. The default is usually "TruCap". |
|
Region |
Specifies the AWS account region required for connecting to AWS Textract. |
|
S3Bucket |
Refers to an AWS storage object (S3 bucket) for storing OCR-related data. Note To perform OCR on a multi-page document, upload the document to the S3 bucket. To do so, the OCR user must have access rights to the storage bucket. |
|
UseS3Storage |
Option to indicate user preference for using S3 storage. |
|
ValidExtensions |
Supports file formats such as .PDF, .TIF, .TIFF, etc. |
Searchable PDF
By configuring this parameter based on your preferences and the nature of the documents you're processing, you can achieve higher accuracy and improved searchability in the resulting Searchable PDF files.
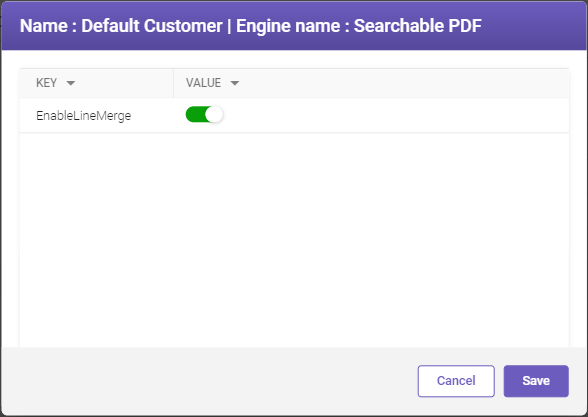
Refer the table below for parameter description.
|
FIELD |
DESCRIPTION |
|---|---|
|
EnableLineMerge |
Enables the logic that combines broken lines received from OCR. |
Leadtools
By configuring the parameters according to your application's requirements, you can ensure seamless integration with the Leadtools OCR engine and accurate text recognition within your documents.
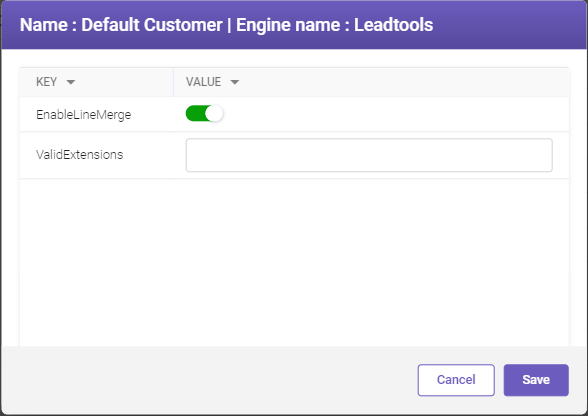
Refer the table below for parameter description.
|
FIELD |
DESCRIPTION |
|---|---|
|
EnableLineMerge |
Enables the logic that combines broken lines received from OCR. |
|
ValidExtensions |
Supports file formats such as .TIF, .TIFF, etc. |
Parascript
By configuring the parameters according to your application's requirements, you can ensure successful integration with the Parascript OCR engine and achieve accurate text recognition within your documents.
Note:
The Parascript software must be installed independently in the environment where the OCR service will run.
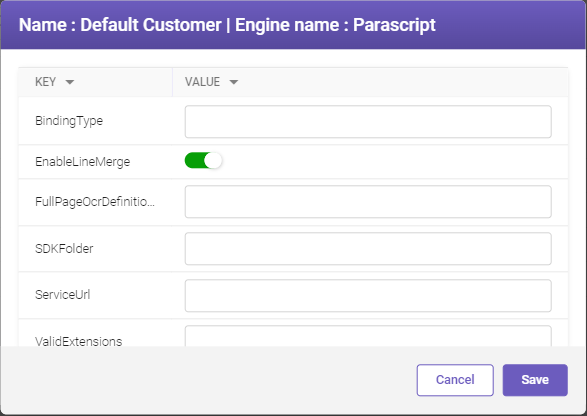
Refer the table below for parameter description.
|
FIELD |
DESCRIPTION |
|---|---|
|
BindingType |
Specifies the binding type to connect to the Parascript OCR service. |
|
EnableLineMerge |
Enables the logic that combines broken lines received from OCR. |
|
FullPageOcrDefinitionfile |
Specifies the OCR template definition file path. If left blank, the default template will be used. |
|
SDKFolder |
Specifies the file path location where the Parascript software is installed. |
|
ServiceUrl |
Specifies the service URL to connect to the Parascript OCR service. |
|
ValidExtensions |
Supports file formats such as .PDF, .TIF, .TIFF, etc. |